

There’s something magical about pulling a tray of warm cookies or a golden loaf of bread out of the oven. The smell fills your kitchen, the texture is just right, and you feel proud knowing you made it yourself.
But if you’re new to baking, it can feel confusing. Why do some recipes call for cold butter while others want it softened? What’s the difference between baking powder and baking soda? And why did your cake sink in the middle?
This guide will walk you through the basics of how baking actually works. You’ll learn what happens inside your oven, why certain ingredients behave the way they do, and how to troubleshoot common problems. By the end, you’ll feel more confident every time you start a new recipe.
📋 Quick Guide Summary
- What this is: A beginner-friendly explanation of baking science and techniques
- Who it’s for: Anyone starting their baking journey or wanting to understand the “why” behind recipes
- What you’ll learn: Ingredient roles, oven science, mixing methods, and troubleshooting tips
- Why it matters: Understanding how baking works helps you follow recipes better and fix mistakes when things go wrong
Table of Contents
- What Baking Really Is
- Why Understanding Baking Science Helps You
- The Main Ingredients & What They Do
- How Heat Changes Your Batter or Dough
- Basic Mixing Methods Explained
- Oven Temperature & Why It Matters
- Common Baking Mistakes & How to Fix Them
- Essential Baking Tools for Beginners
- Tips for Following Recipes Successfully
- FAQs
What Baking Really Is
Baking is a cooking method that uses dry heat in an enclosed space—your oven—to transform ingredients into something delicious.

Unlike cooking on the stovetop where you can taste and adjust as you go, baking is more exact. Once your cake batter or cookie dough goes into the oven, you can’t stir in more sugar or add extra flour.
That’s why baking is often called a science. The measurements matter. The order you mix things matters. The temperature matters.
But don’t let that intimidate you. Once you understand a few basic principles, baking becomes much easier.
Think of it this way: every baked good is just a combination of a few core ingredients—flour, fat, sugar, eggs, and leaveners—that react with heat in predictable ways.
When you know what each ingredient does and how heat affects them, you can troubleshoot problems, adjust recipes, and even create your own versions.
Why Understanding Baking Science Helps You
You might be wondering: “Can’t I just follow the recipe?”
Of course you can. But understanding the “why” behind the steps makes you a better baker.
Here’s what happens when you know how baking works:
You can troubleshoot problems. If your cookies spread too thin, you’ll know it’s probably too much butter or sugar, or your dough was too warm.
You can make substitutions. You’ll understand which swaps work (like using yogurt instead of sour cream) and which don’t (like replacing all-purpose flour with almond flour without adjusting other ingredients).
You’ll feel more confident. Instead of blindly following instructions, you’ll know what’s happening at each step and why it matters.
You can adapt recipes. Want to make your brownies fudgier? You’ll know to add an extra egg yolk and reduce the flour slightly.
Baking is all about controlling chemical reactions. When you understand those reactions, you’re in control.
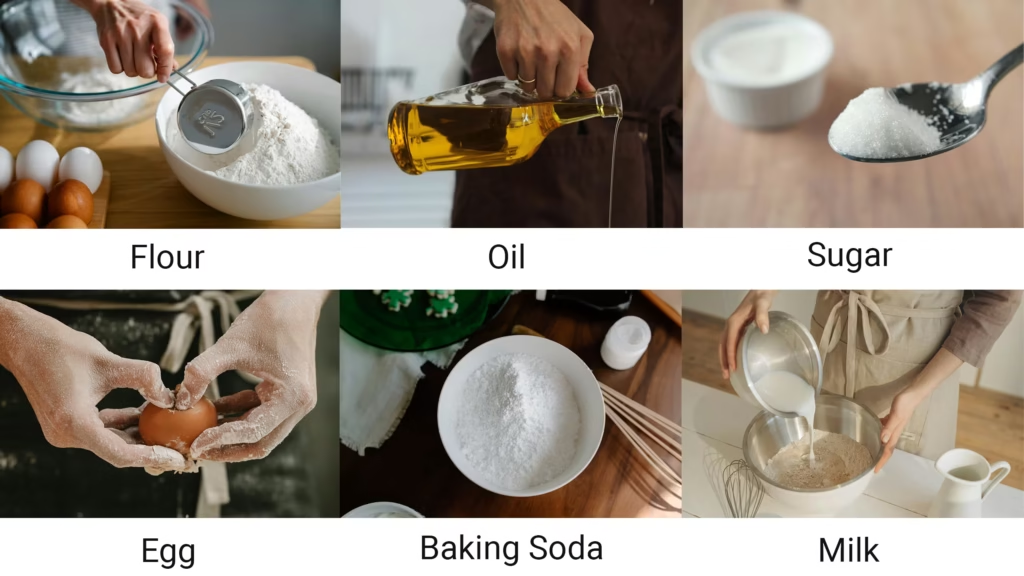
The Main Ingredients & What They Do
Every baking recipe uses the same basic ingredients. Each one has a specific job.
Flour
Flour is the foundation of most baked goods. It provides structure.
When flour mixes with liquid, proteins in the flour (mainly gluten) form a network that traps air and gives your baked goods shape and texture.
All-purpose flour is the most versatile. It has moderate protein content and works for cookies, cakes, muffins, and basic breads.
Bread flour has more protein, which creates more gluten. This gives bread its chewy texture.
Cake flour has less protein, making tender, soft cakes.
The more you mix or knead dough, the more gluten develops. That’s great for bread but not for cakes or muffins, which should be tender.
Fat (Butter, Oil, Shortening)
Fat makes baked goods moist, tender, and flavorful.
It coats flour particles and prevents too much gluten from forming. That’s why cakes and cookies are soft instead of chewy like bread.
Butter adds rich flavor and helps with texture. When creamed with sugar, it traps air bubbles that make cakes light.
Oil creates extra moist baked goods because it’s liquid at room temperature. It’s common in carrot cakes and muffins.
Shortening is flavorless but creates very tender textures. Some bakers use a mix of butter (for flavor) and shortening (for texture).
Sugar
Sugar does more than sweeten.
It tenderizes by interfering with gluten formation. It also holds moisture, keeping your baked goods soft for days.
Sugar caramelizes in the oven, creating that golden-brown color and deeper flavor.
In cookies, more sugar means more spread. In cakes, it helps create a fine, soft crumb.
Granulated sugar is standard for most recipes.
Brown sugar contains molasses, which adds moisture and a slight caramel flavor. It makes cookies chewier.
Powdered sugar dissolves easily and is used in frostings and delicate cookies.
Eggs
Eggs bind ingredients together and add moisture, richness, and structure.
The whites provide structure and help with rising. The yolks add fat, richness, and color.
Eggs also act as a leavener when beaten, trapping air that expands in the oven.
In cookies, an extra yolk makes them richer and chewier. An extra white makes them cakier.
Most recipes use large eggs. Using a different size can throw off the balance of wet and dry ingredients.
Leaveners (Baking Powder & Baking Soda)
Leaveners make baked goods rise by creating gas bubbles.
Baking soda is a base. It needs an acid (like buttermilk, yogurt, brown sugar, or vinegar) to activate. It works fast, so you need to bake right away.
Baking powder contains both an acid and a base. It activates twice—once when mixed with liquid, and again when heated. This makes it more forgiving.
Using too much leavener makes baked goods taste metallic or soapy. Too little and they’ll be dense.
Liquid (Milk, Water, Buttermilk)
Liquids hydrate the flour, dissolve sugar and salt, and activate leaveners.
They also create steam in the oven, which helps with rising.
Milk adds flavor, richness, and helps with browning.
Buttermilk is acidic, which tenderizes and adds tang. It’s often paired with baking soda.
Water is neutral and lets other flavors shine.
Salt
Salt enhances flavor, even in sweet baked goods.
It also strengthens gluten, giving bread better structure, and controls yeast activity.
Never skip the salt. Even a small amount makes everything taste better.
How Heat Changes Your Batter or Dough
When you put batter or dough in the oven, a series of transformations happen.
Understanding these stages helps you know what’s happening behind the oven door.
Stage 1: Gases Expand
As the oven heats your batter or dough, air bubbles and gas from leaveners expand rapidly.
This is when your cake rises, your bread puffs up, and your cookies spread.
Stage 2: Fats Melt
Butter and other fats melt, allowing the batter or dough to spread and settle into its final shape.
This is why cookies spread in the oven and why chilling dough helps them hold their shape longer.
Stage 3: Starches Gelatinize
Around 140°F, starches in the flour absorb moisture and swell. This thickens the batter and starts to set the structure.
Stage 4: Proteins Coagulate
Eggs and gluten proteins firm up, giving your baked good its final structure.
This is when your cake goes from liquid batter to solid cake.
Stage 5: Browning
Sugars caramelize and proteins undergo the Maillard reaction, creating that golden-brown color and rich, toasty flavor.
This happens mostly on the surface where it’s hottest.
Stage 6: Moisture Evaporates
Water evaporates, creating a crust and drying out the exterior slightly.
This is why the outside of bread is crispy while the inside stays soft.
All of this happens in a specific order. If your oven is too hot, the outside will set before the inside cooks. If it’s too cool, everything spreads too much before it sets.
Basic Mixing Methods Explained
How you mix your ingredients affects the final texture.
Here are the most common methods:
Creaming Method
Used for: Cookies, cakes, some muffins
You beat softened butter and sugar together until light and fluffy. This traps air bubbles that help your baked goods rise.
Then you add eggs, followed by dry and wet ingredients alternately.
This method creates a tender, fine crumb.
Muffin Method
Used for: Muffins, quick breads, pancakes
You mix all the dry ingredients in one bowl and all the wet ingredients in another. Then you gently combine them with just a few stirs.
Lumps are okay. Overmixing creates tough, dense muffins because it develops too much gluten.
Biscuit Method
Used for: Biscuits, scones, pie dough
You cut cold butter into the dry ingredients until the mixture looks like coarse crumbs. Then you add liquid and mix just until combined.
The cold butter creates flaky layers when it melts in the oven.
Folding
Used for: Delicate batters with whipped eggs or cream
Folding means gently combining ingredients with a spatula using a lifting and turning motion.
This preserves air bubbles in whipped egg whites or cream, keeping the batter light.
It’s used for soufflés, angel food cake, and mousse.
Oven Temperature & Why It Matters
Your oven temperature determines how fast your baked goods cook and how they turn out.
Always Preheat
Putting batter or dough into a cold oven throws off the entire process.

Leaveners activate at specific temperatures. If the oven is too cool, cookies spread too much. If it’s too hot, the outside burns before the inside cooks.
Preheat for at least 15-20 minutes.
Use an Oven Thermometer
Most ovens are off by 10-25 degrees.
An oven thermometer (they’re cheap) shows the real temperature. Adjust your oven dial accordingly.
This simple tool solves so many baking problems.
Understand Temperature Effects
High heat (400°F+): Creates a crispy exterior. Good for bread, pizza, biscuits.
Moderate heat (325-375°F): Standard for cookies, cakes, muffins. Gives even baking.
Low heat (300°F or less): Used for delicate items like meringues or slow-baking cheesecakes.
Don’t Open the Oven Door Constantly
Every time you open the door, the temperature drops 25-50 degrees.
This interrupts the baking process and can cause cakes to sink.
Use the oven light and look through the window instead.
Check for doneness only in the last few minutes of baking.
Common Baking Mistakes & How to Fix Them
Even experienced bakers make mistakes. Here’s how to avoid the most common ones.
Mistake: Dense, Heavy Texture
Causes:
- Overmixing the batter (too much gluten developed)
- Not enough leavener
- Old baking powder or baking soda
- Oven temperature too low
Fixes:
- Mix just until combined
- Check expiration dates on leaveners
- Use an oven thermometer
Mistake: Baked Goods Spreading Too Much
Causes:
- Dough too warm
- Too much butter or sugar
- Not enough flour
- Baking sheet too hot
Fixes:
- Chill cookie dough for 30 minutes before baking
- Measure flour correctly (spoon and level, don’t scoop)
- Use cool baking sheets
Mistake: Dry, Crumbly Results
Causes:
- Too much flour
- Overbaking
- Not enough fat or liquid
Fixes:
- Measure flour by spooning it into the cup and leveling off
- Set a timer and check a few minutes early
- Add an extra tablespoon of butter or milk next time
Mistake: Cake Sinks in the Middle
Causes:
- Opening the oven door too early
- Too much leavener
- Oven temperature too low
- Underbaking
Fixes:
- Don’t open the door until at least 3/4 through baking time
- Measure leaveners carefully
- Check your oven temperature
Mistake: Uneven Baking
Causes:
- Hot spots in your oven
- Baking sheet too close to the oven wall
- Oven rack not centered
Fixes:
- Rotate your pan halfway through baking
- Use the center rack
- Leave space around the pan for air circulation
Essential Baking Tools for Beginners
You don’t need fancy equipment to start baking. Here are the basics:
Measuring Cups and Spoons
Accurate measuring is crucial in baking.
Get a set of dry measuring cups (for flour, sugar) and a liquid measuring cup (with a spout for water, milk).
Measuring spoons are used for small amounts like baking powder, vanilla, and salt.
Mixing Bowls
Have at least two or three in different sizes.
Glass or stainless steel work best. Avoid plastic for whipping egg whites—it can hold onto grease.
Whisk, Wooden Spoon, and Rubber Spatula
A whisk is great for combining dry ingredients and beating eggs.
A wooden spoon is sturdy for thick dough.
A rubber spatula scrapes bowls clean and folds delicate batters.
Baking Sheets and Pans
For cookies: rimmed baking sheets
For cakes: 8-inch or 9-inch round pans
For brownies and bars: 9×13-inch pan
For muffins: a 12-cup muffin tin
Light-colored pans work best. Dark pans absorb more heat and can over-brown the bottom.
Oven Thermometer
As mentioned earlier, this is essential for accurate baking.
Cooling Rack
Lets air circulate around baked goods so they don’t get soggy on the bottom.
Parchment Paper
Prevents sticking and makes cleanup easy.
It’s especially helpful for cookies and cakes.
Tips for Following Recipes Successfully
Baking recipes aren’t suggestions—they’re formulas. Here’s how to follow them right.
Read the Entire Recipe First
Before you start, read through all the steps.

Make sure you have all the ingredients and understand the timing.
Measure Accurately
For flour: spoon it into the measuring cup and level it off with a knife. Don’t scoop directly from the bag—it packs in too much.
For brown sugar: pack it firmly.
For liquids: use a liquid measuring cup and check at eye level.
Use Room Temperature Ingredients When Called For
Cold butter won’t cream properly with sugar.
Cold eggs can curdle your batter.
Let butter, eggs, and dairy sit out for 30-60 minutes before baking.
Follow the Order of Steps
Recipes list steps in a specific order for a reason.
Creaming butter and sugar first traps air. Adding eggs one at a time prevents curdling. Alternating dry and wet ingredients prevents overmixing.
Don’t Substitute Unless You Know What You’re Doing
Swapping ingredients changes the chemistry.
Some substitutions work fine (Greek yogurt for sour cream), but others don’t (almond flour for all-purpose flour).
Stick to the recipe until you understand how ingredients interact.
Set a Timer
It’s easy to lose track of time.
Set a timer for a few minutes before the minimum baking time. Check for doneness, then continue baking if needed.
FAQs
Q: What’s the difference between baking powder and baking soda?
Baking soda is a base that needs an acid (like buttermilk or brown sugar) to create the reaction that makes baked goods rise. It works immediately, so you should bake right away. Baking powder contains both an acid and a base, so it doesn’t need additional acidic ingredients. It activates twice—once when wet and again when heated—making it more forgiving. They’re not interchangeable in recipes.
Q: Why do some recipes call for room temperature butter and others cold?
Room temperature butter is soft enough to trap air when creamed with sugar, creating light, fluffy cakes and cookies. Cold butter is used when you want distinct pieces of fat in the dough, like in biscuits or pie crusts, which create flaky layers when the butter melts in the oven. The recipe specifies the temperature based on the texture it’s trying to achieve.
Q: How do I know when my baked goods are done?
For cakes and muffins, insert a toothpick into the center—if it comes out clean or with a few moist crumbs, they’re done. For cookies, look for set edges and slightly soft centers; they’ll firm up as they cool. For bread, tap the bottom—it should sound hollow. The surface should also be golden brown. Using visual and tactile cues together gives the best results.
Q: Can I open the oven door to check on my baking?
It’s best to avoid opening the oven door until at least three-quarters through the baking time. Every time you open the door, the temperature drops by 25-50 degrees, which can cause cakes to sink or baking times to extend. Use the oven light and look through the window instead. Only open the door when you’re close to the end of the suggested baking time.
Q: Why is my cake dense instead of light and fluffy?
Dense cakes usually result from overmixing the batter, which develops too much gluten, or from using expired leavening agents that no longer create enough lift. It can also happen if you add too much flour (from scooping instead of spooning and leveling) or if your oven temperature is too low. Make sure to mix just until combined and check that your baking powder or soda is fresh.
Q: Do I really need to sift flour?
For most everyday baking, sifting isn’t necessary if you spoon and level your flour properly. However, sifting is helpful for delicate cakes where you want an ultra-light texture, or when a recipe specifically calls for it. Sifting removes lumps, aerates the flour, and ensures even mixing with other dry ingredients like cocoa powder or baking powder. When a recipe says “1 cup sifted flour,” sift before measuring.
Conclusion
Baking doesn’t have to feel mysterious or intimidating. Once you understand the role of each ingredient and what happens when heat transforms your batter or dough, you’ll feel more confident with every recipe you try.
Start simple. Master a basic chocolate chip cookie or a simple banana bread. Pay attention to what works and what doesn’t. Over time, you’ll develop a feel for dough texture, baking times, and when something needs a little more flour or liquid.
Remember: even experienced bakers make mistakes. The difference is they know how to fix them.
Keep practicing, stay curious, and don’t be afraid to experiment once you’ve got the basics down.